Amazon Pay Your Session Has Expired. Please Sign in Again by Clicking on the Amazon Pay Button.
![]()
Yous can detect this section under Payment Processing > Amazon Pay Settings in the IRP Admin left navigation menu.
This section is where y'all configure some of the key settings for the IRP Amazon Pay Integration characteristic. Here you can ascertain Sandbox usage and y'all can also select the currencies and countries that are supported. In add-on, you can define the fashion to authenticate customer Amazon Pay accounts and configure an Amazon Pay push button to announced on the beginning folio of the checkout.
The AmazonPaySettings.aspx page appears as follows:
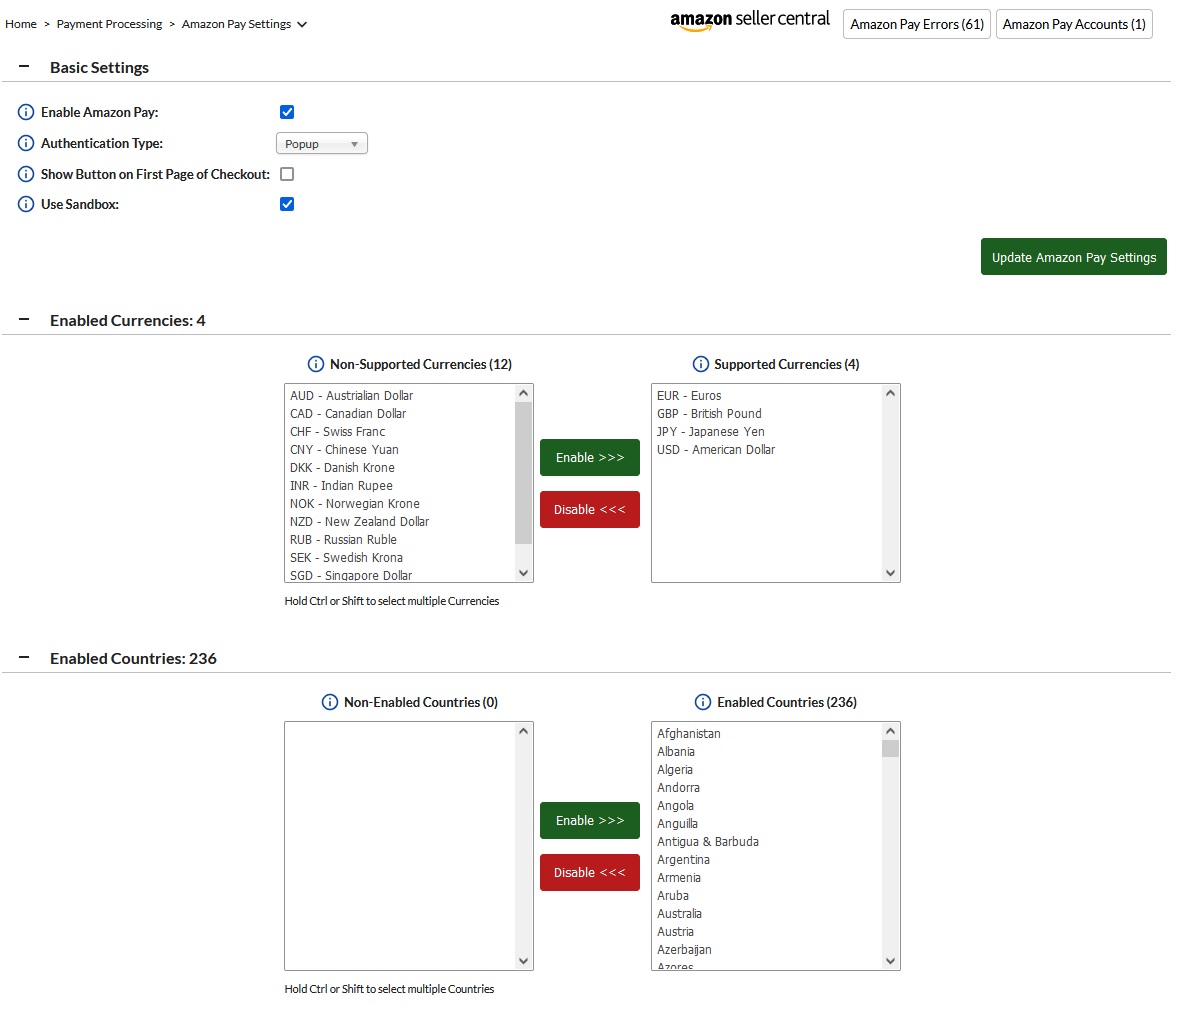
At the pinnacle of the page you can meet the following buttons:
- Amazon Seller Key: Click this push button to go to the Amazon Seller Central login folio.
- Amazon Pay Errors: Click this push button to go to the AmazonPayTransactions.aspx page. For more details, see the Amazon Pay Errors and Transactions section below.
- Amazon Pay Accounts: Click this button to become to the AmazonPayAccounts.aspx page. For more than details, see the Amazon Pay Accounts help topic.
You can see the following settings in the main body of the folio:
| Setting | Description |
|---|---|
| Basic Settings | |
| Enable Amazon Pay | Checking or unchecking this box dictates whether or not Amazon Pay is enabled on your website. If you take valid, agile Amazon Pay accounts in your IRP, and Shipping Countries ready up to allow Amazon Pay, if this overall global setting is enabled, an Amazon Pay button will appear on the Handbasket and Payment Details page on the Desktop and Mobile versions of the site. Clicking this will prompt users to log in using their Amazon Account credentials. On successful login, an Address Volume and Wallet widget will announced on the Gild Summary pages in the Desktop and Mobile checkout inviting customers to select a Commitment Address and Payment Method from those stored within their Amazon Account. |
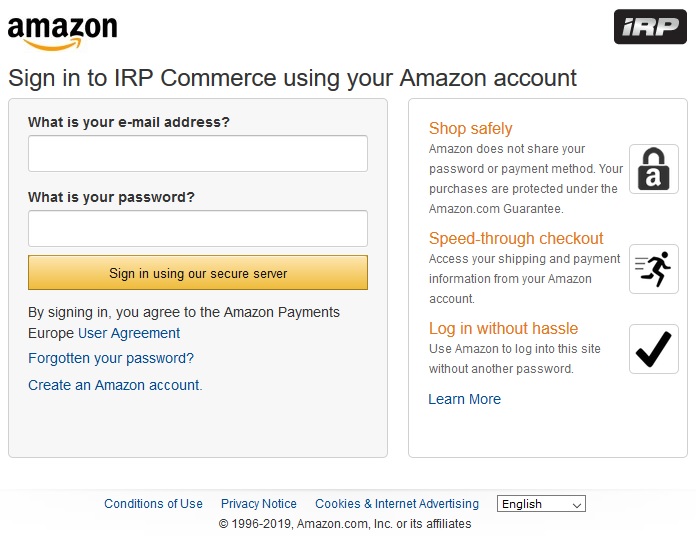
| Authentication Type | You can chose from two methods of authenticating Amazon Pay Accounts: i) Popup: a popup page will be triggered when the customer clicks the Amazon Pay push button, and ii) Redirect: the browser will redirect the client to a hosted Amazon login page. Note that the Mobile site will E'er utilise the Redirect Hallmark Type but you lot can configure the Desktop site to employ either method. In either case, the client will run into a window similar to the post-obit: |
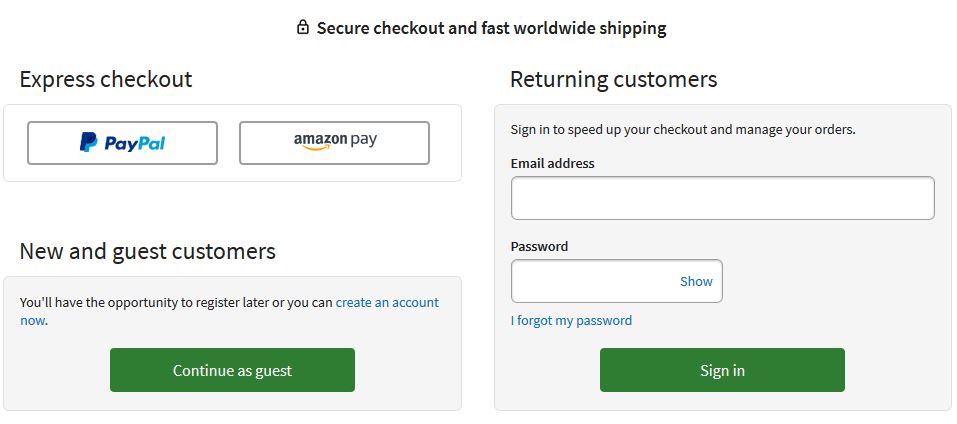
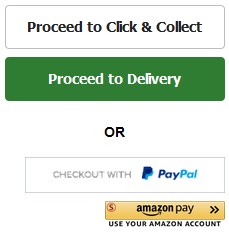
| Show Push on First Page of Checkout | If enabled, an Amazon Pay Button will announced on the starting time page of the Checkout process if the following conditions are met: - The 'Enable Amazon Pay' Awarding Setting is set to true - The 'Enable Shipping By Delivery Date' Awarding Setting is set to simulated - The order is not a telesale order - The basket does not contain items that are not able to exist purchased via Amazon Pay - There is an active Amazon Business relationship for the customer's currency and shipping state If all of the above weather condition are true, the Amazon Pay button volition announced on the first page of the Checkout, as in the following case: |
| Utilise Sandbox | If enabled, the Amazon Pay Sandbox Endpoints will be used rather than the Production ones. This will allow you to test transactions with your Sandbox business relationship before setting your Amazon Pay account live. |
| Enabled Currencies | |
| Non-Supported Currencies / Supported Currencies | 'Non-Supported Currencies' are the currencies that Amazon Pay does not support (cannot charge in). 'Supported Currencies' are the currencies that Amazon Pay supports (can charge in). To motion currencies from one box to the other, highlight the currency (and use the Shift key for multiple currencies) and click either the 'Enable' or 'Disable' button, as appropriate. Currently, Amazon Pay supports charging in GBP, EUR, USD and JPY. The configuration here will be reflected on the specific CurrencyEdit.aspx page of each currency ('Supported past Amazon Pay' setting). For more information, see the Currencies help topic. |
| Enabled Countries | |
| Non-Enabled Countries / Enabled Countries | 'Non-Enabled Countries' are the Aircraft Countries that Amazon Pay is not enabled for. Should a customer's settings exist set to one of the beneath countries, they will not see an Amazon Pay push on the Handbasket or Payment Details page. Also, if the customer selects a Delivery Address from one of the beneath countries, an error message will be displayed on the Guild Summary folio and the 'Place Order' button will be hidden. 'Enabled Countries' are the Shipping Countries that Amazon Pay is enabled for. If Amazon Pay is enabled and there are valid Amazon Pay Accounts agile on your IRP, an Amazon Pay button will appear on the Handbasket and Payment Details page if the customer'south state settings are set to ane of the beneath countries. To move countries from one box to the other, highlight the country (and utilise the Shift fundamental for multiple countries) and click either the 'Enable' or 'Disable' button, as appropriate. The configuration hither will exist reflected on the specific ShippingCountries.aspx page of each currency ('Enable Amazon Pay' setting). For more information, run across the Shipping Countries assistance topic. |
When you make any changes on this page, be sure to click the Update Amazon Pay Settings button.
Amazon Pay errors and transactions
Y'all can also see errors associated with Amazon Pay transactions by clicking the Amazon Pay Errors button at the top of the main AmazonPaySettings.aspx folio. This takes yous to the AmazonPayTransactions.aspx folio where you lot can view total details of all transactions.
The AmazonPayTransactions.aspx folio appears as follows:
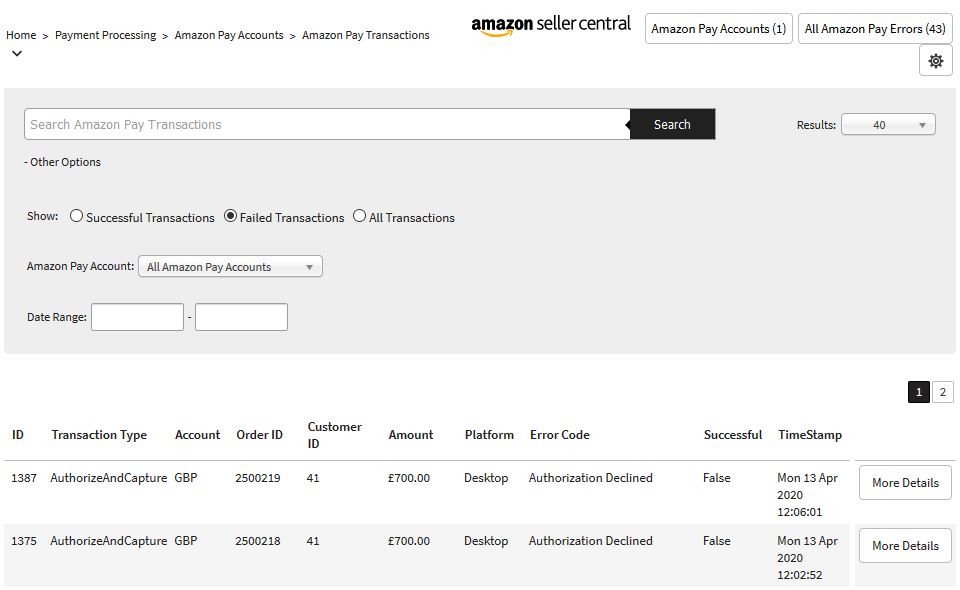
You can use the search bar to find whatever Amazon Pay Account, All Transactions, Successful Transactions or Failed Transactions. The main grid shows numerous details including the ID, Transaction Type, Account, Lodge ID, Customer ID, Corporeality, Platform, Mistake Lawmaking, Success status and TimeStamp.
To view the details of whatever transaction, click the More Details push button. This takes you to the AmazonPayTransactionDetails.aspx page where y'all tin can see full transaction details, mistake details and the response from Amazon Pay.
Placement of buttons on checkout pages
By default, the PayPal push appears higher up the Amazon Pay button on the Basket.aspx or MobileBasket.aspx folio:
Nonetheless, you lot can control the social club in which the buttons appear using the following CSS classes in the Website CSS Stylesheet:
- .amazon-paypal-container
- .amazon-paypal-container .paypal-handbasket
- .amazon-paypal-container .paypal-login
- .amazon-paypal-container .amazon-container
- .amazon-paypal-container .paypal-container
- .amazon-paypal-container .amazon-basket, .amazon-paypal-container .amazon-login
marshallsonfe1976.blogspot.com
Source: https://www.irpcommerce.com/en/gb/IRPSupport/Amazon-Pay-Settings/kb-341.aspx
0 Response to "Amazon Pay Your Session Has Expired. Please Sign in Again by Clicking on the Amazon Pay Button."
Post a Comment